
Building A Vintage 486 PC
The 486 PC has a special place in my heart as it was the first real computer my family owned, and the time I spent using it likely fueled my desire to maintain computers as a hobby. If you’ve read some of my other posts about legacy hardware and software, I do mention the first computer I personally owned was a Macintosh. I had probably spent at least a year using a 486 PC prior to that purchase. I don’t remember a whole lot from those days but our 486 started life as a DX33 with Windows 3.11 for Workgroups, and ending as a Cyrix DX2/80 with Windows 95. I believe it originally had a Pro AudioSpectrum 16 (PAS16) card before being upgraded to a Creative Labs AWE32 at some point. As part of my “reliving my glory days” attitude, I’ve decided to build my own vintage 486 PC and run some of the old software titles I grew up with.

For my build, I actually ended up buying two motherboards on eBay though I’ve so far been unable to get the better of the two working properly. I also needed to buy a few cards such as my ISA network adapter and the IDE/floppy controller off eBay as my personal collection didn’t already include these. I’ll go over my build list below.
- “Symphony” 486DX board with AMI BIOS. Originally used the DX33 CPU but I installed an Intel Overdrive DX2/66 CPU I happened to have in my collection. The board features 8 x 30 pin RAM slots though I believe only 4 are working, so I purchased 4 sticks of 4MB RAM for a total of 16MB RAM. The board is only ISA so no PCI or VLB slots. I also faced the problem of the onboard RTC battery being dead, so I used this guide to connect a 3V cell battery to it.
- My video is powered by a Diamond SpeedStar 64 with 2MB memory. Seems like a decent card for ISA-only systems. This card was likely in my personal collection unused for over 10 years.
- My audio is provided by a Creative Labs Sound Blaster 16. Like my video card, I had this sitting in a box for years. You can download the raw disk driver images here: disk 1, disk 2, disk 3.
- For storage I decided to go with a small Compact Flash card and a CF-to-IDE adapter instead of traditional spinning disk. These two items were cheap enough off eBay. In my case the BIOS would accept a value greater than 1024 cylinders but DOS cannot allocate a disk larger than ~500MB. You can get around this with a third party utility such as OnTrack Disk Manager.
- My I/O controller is a fairly generic card. It includes one IDE port and one floppy port. This was a component I needed to buy off eBay, so I’ll note that cards such as this with jumper settings will need to be reviewed before you try using it. The one I purchased had the card mode set to secondary instead of primary, and my attached COM port was disabled. I discovered this after I had everything hooked up.
- I opted to include a CD-ROM drive in my build as I had a few sitting around in my collection. I’m not sure it had an actual brand, but I discovered it was Mitsumi based after loading that driver made the CD-ROM show up. You can download the raw disk driver image here. I’ll also link to the Microsoft CD extensions 1.25 image here which I believe was for LG based drives.
- For my networking, I’m using a 3Com EtherLink III ISA card. This seemed to have automatic support in Windows 3.11 as I did not need to install 3Com-specific disks.
- For input devices I’m using a basic PS2 keyboard with an AT adapter plug, and a 9-pin serial Logitech mouse from eBay. I did also install a controller card for a Logitech hand scanner I found in my collection though I haven’t gone driver hunting for that yet.
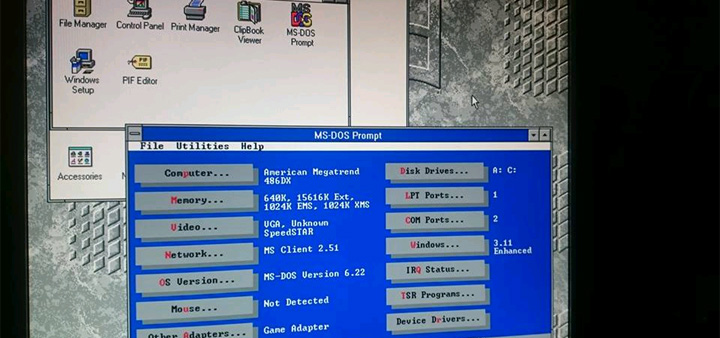
Everything seemed to come together decently and I now have a 486 PC with MS-DOS 6.22 and Windows 3.11 for Workgroups. I’ll include some additional build notes below as well as links to software you’ll want to get. If you don’t already have a copy of the OS you want to run, check out the WinWorld library or use Hotline/KDX to connect to Higher Intellect’s software archive at hl.preterhuman.net.
- After you install MS-DOS and Windows (assuming you’re installing 3.11 or below), run memmaker.exe in the C:\DOS directory and it will help optimize your config.sys and autoexec.bat files. Running without EMM386 will cause annoying problems in Windows when you try to install other software, and a default DOS/WIN install I don’t believe will perform any extended memory optimization. I also recommend you Google around to see examples of other people’s configurations if you want to really get the most out of your setup.
- You’ll probably want PKUNZIP to deal with ZIP archives you download. You can grab it using a modern browser from https://preterhuman.net/drivers/pkunzip.exe or use an FTP client from an older system and connect to ftp://ftp.altexxanet.org as an anonymous user (full URL is ftp://ftp.altexxanet.org/DOS-WIN_Downloads/pkunzip.exe).
- To add some 32-bit support to Windows 3.1/3.11, you’ll want to install the Win32s package. This can be downloaded from the WinWorld library or FTP from ALTEXXANET at ftp://ftp.altexxanet.org/DOS-WIN_Downloads/ole32s13.exe.
- If you’ve got your PC setup to do networking, you’ll want to get the TCP/IP support for Windows. The Microsoft TCP/IP-32 disk image can be downloaded from the WinWorld library. This adds TCP/IP on top of the existing IPX and also gives you a few utility programs such as FTP and telnet clients. If you plan on doing a lot of FTP transfers in Windows, you might want to grab a copy of WS_FTP from ftp://ftp.altexxanet.org/DOS-WIN_Downloads/ws_ftp.zip.
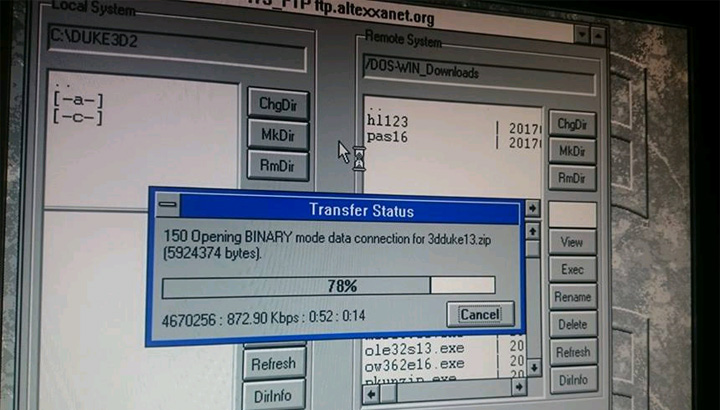
Here’s a picture of my 486 using WS_FTP to download the Duke Nukem 3D shareware archive from the ALTEXXANET public FTP server.
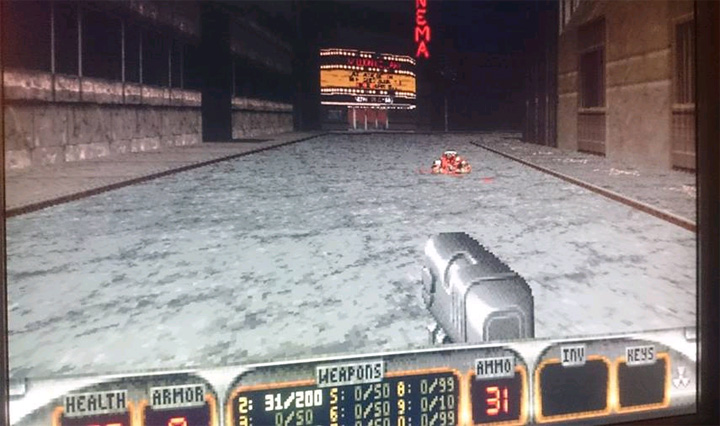
Here’s a picture of Duke Nukem 3D actually running, albeit a little slow on this system.
There you have it! My plans for this include tracking down some of the other old games I used to play back in the 90s. My other 486 motherboard includes PCI and 72-pin RAM so I may still try getting that board working to replace this one. I won’t go beyond Windows 3.11 on this type of system. I may build another tower with an early Pentium if I need faster game support.


KolibriOS give it a try.