Web Application Firewall with HTTPS on Sophos UTM
I’m a big fan of the Sophos UTM product so you can expect more articles focusing on using and configuring the firewall to do neat things. Today’s article will discuss using a web server behind the Web Application Firewall and configuring the UTM to redirect HTTP to HTTPS for all inbound requests.
1) First thing you’ll need is an external IP address bound to one of the UTM’s interfaces. For this example I’ve gone to Interfaces -> Additional Addresses and created a new IP on my existing WAN interface. If your upstream provider has routed a block of IPs to you, this additional address would be one of those. You’ll also want to set the netmask of this address to /32.
2) Now we’ll configure the “real” web server. Go to Webserver Protection -> Web Application Firewall and click the Real Webservers tab. Create a new entry with a descriptive name and either create or assign a host object for your internal server. For this article I created an object called “ssltest.omgwtfbbq.ca” with the IP of the test server attached to the UTM’s internal network. For the type setting, you can either use it as HTTP or HTTPS if you’ve enabled SSL on the internal web server. Leaving it as HTTP means traffic between the UTM and your internal server would not be encrypted (might not matter to you). Save your record and make sure the server is marked as enabled in the list.
3) Before we create the virtual server, we’ll need to have our SSL certificate issued and uploaded to the UTM. The below example is how I generated the private key and CSR on a Linux box.
openssl req -nodes -newkey rsa:2048 -keyout omgwtfbbq.key -out omgwtfbbq.csr
You then need to take your generated CSR and obtain a certificate. For this article, I went with StartSSL’s free basic certificate. I also grabbed the CA bundle along with the issued certificate.
4) The certificate upload method I used for the Sophos UTM was a PKCS#12 (PFX) file. StartSSL actually had a tool to generate one, but here’s how you could also do it from a Linux command line (assuming you’ve placed your issued certificate in the same place as your private key and CSR):
openssl pkcs12 -export -in omgwtfbbq.crt -inkey omgwtfbbq.key -out omgwtfbbq.p12
5) Back in the Sophos UTM go to Webserver Protection -> Certificate Management and click the New Certificate button under the Certificates tab. Enter a descriptive name for your certificate and change the method to Upload. Type should default to PKCS#12. Select the file you generated in step 4 and enter the password used when generating the file. I also uploaded the CA bundle under the Certificate Authority tab. Alternatively I believe you could package this into your PKCS#12 file.
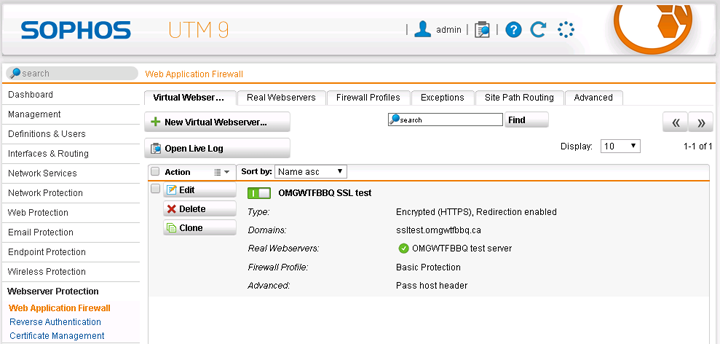
6) Now we’ll create the virtual server entry in the WAF. Go to the Webserver Protection -> Web Application Firewall area and click New Virtual Webserver under the Virtual Webservers tab. Give it a descriptive name, attach the secondary interface you created in step 1, set type to “Encrypted (HTTPS) & redirect” and set the certificate to the one you created in step 5. The domain/subdomain you generated the certificate with will show up under Domains so ensure you’ve checked them as enabled. Under Real Webservers make sure you’ve enabled the server you created in step 2. Your firewall profile can be one of the built-in profiles or you can create a custom one to suite your needs under the Firewall Profiles tab. You may also want to enable the “pass host header” option which will let you configure your internal web server to report actual source IPs in logs instead of the Sophos UTM’s IP.
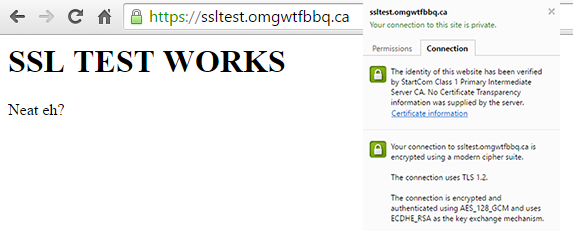
7) Double-check that everything shows up with a green checkmark. You should also make sure a root entry was created under the Site Path Routing tab (the UTM should do this automatically). If everything checks out you should see a valid encrypted connection to your site.
